Cashier Quick Guide
Everything you need at the till: sign in, find a guest, spot the recommendation hint, scan a receipt, and charge or redeem a bonus — in one shift.
01 Sign in with your PIN
Usually one-time per shift device — unless the restaurant locks the till on screen off.
Open the staff link on the shift phone or tablet, enter your own personal PIN, and tap Sign in. Each cashier now has their own PIN — issued on the Staff page, not a single shared code — ask an admin or manager if you don't have one.
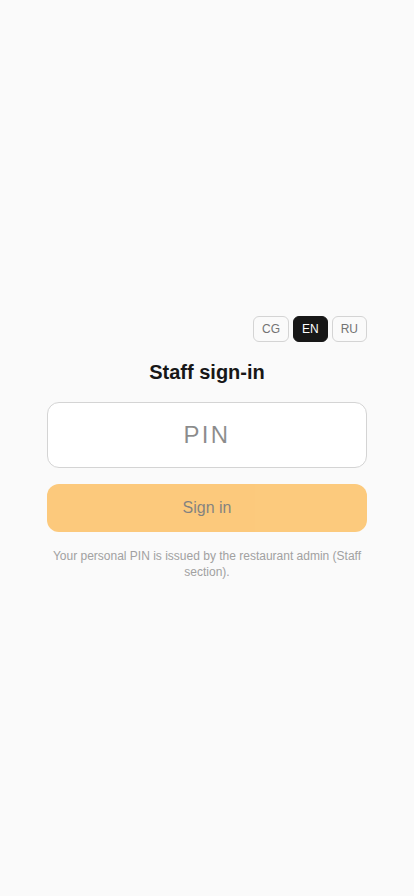
Usually you stay signed in until you log out yourself. But if the admin has turned on "lock till on screen off" in Settings, you'll be signed out the moment the phone's screen locks or turns off, and need to enter your PIN again — that's expected, not a bug.
Signing in from a device you haven't used before may need an admin or manager to approve it first. If the sign-in screen won't move past the PIN, that's likely why — ask them to approve the device on the Staff page.
02 Find the guest
Scan, live search, or an exact card number — whichever's fastest.
- Scan their card
Point the camera at the QR code on the guest's physical card, receipt, or their phone screen. It opens their profile automatically — no button to tap.
- Or start typing their name, phone, or card number
In the search field below the camera — matches appear live as you type, before you press anything. Found the right guest in the list? Just tap that row.
- Know the full card number? Use "Find by number"
Type the number printed on their card (format LC-XXXXXXXXX) and tap Find by number to skip straight past the list.
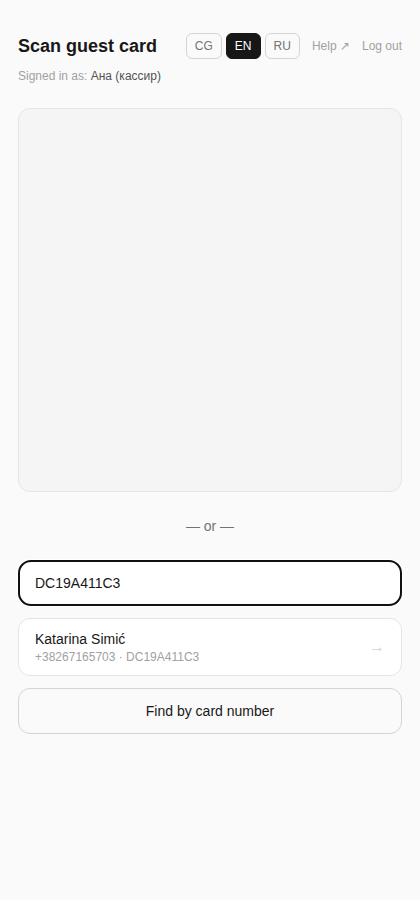
Manual search isn't just a backup for when the camera fails — it's a completely normal, everyday way to find a guest. If the camera can't start (busy with another app, or not available on the device), a yellow warning appears above the search field, and the field itself keeps working exactly as it always does.
03 Charge a purchase
Standard operation on every bill.
- Find the guest
Scan or search as above (step 02). A compact row opens with their name, tier, balance, and card — a yellow hint sometimes appears just under it (see below).
- Make sure "Charge (purchase)" mode is selected
It's the default, left-hand toggle button and is highlighted orange when active.
- If there's a "🧾 Scan receipt" button, use it
Faster and more accurate than typing the amount by hand — see step 04 for the details. If that button isn't there (not every plan has it) or the receipt won't scan, just enter the amount manually as usual.
- Tick a dish if the screen asks you to
If a block reading "Check the dish to award the stamp precisely" appears above the keypad with checkboxes, tick whichever dish the guest actually bought. This only shows up for stamp cards that count a stamp for one specific dish (a cappuccino, say) rather than any purchase.
- Enter the bill total and tap "Record purchase"
Key the amount in on the numpad — that's it, every matching program applies on its own.
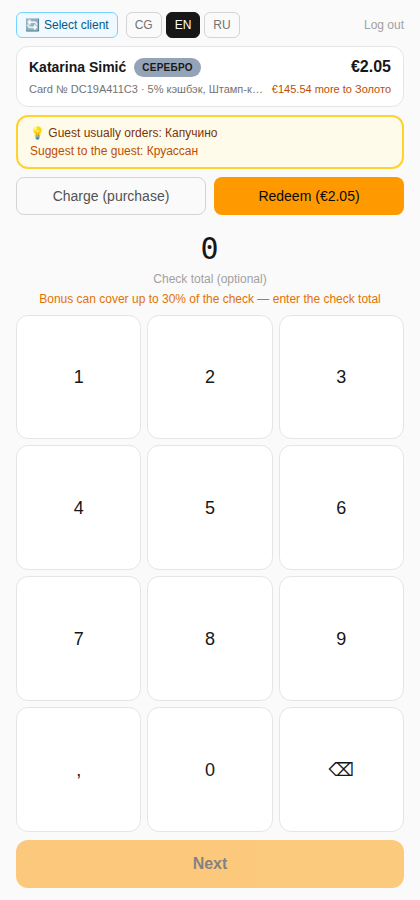
A yellow hint like "💡 Guest usually orders: Капучино · Suggest to the guest: Круассан" can appear on its own whenever the guest has purchase history — a natural moment to suggest what they usually get, or something that pairs with it, before the order's even rung up.
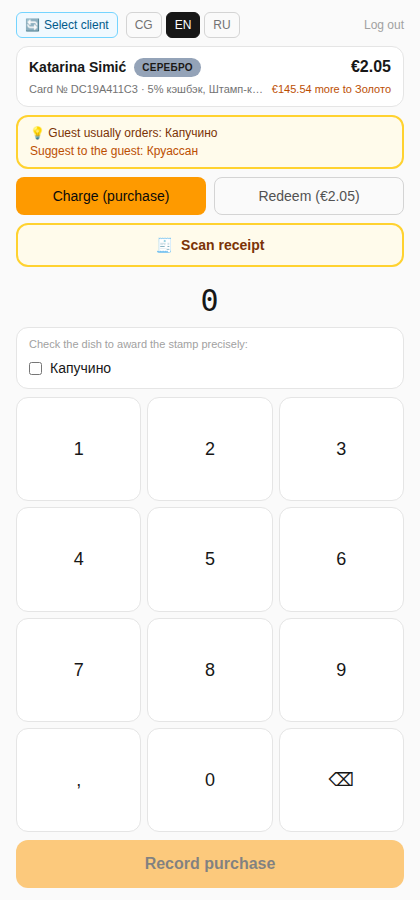
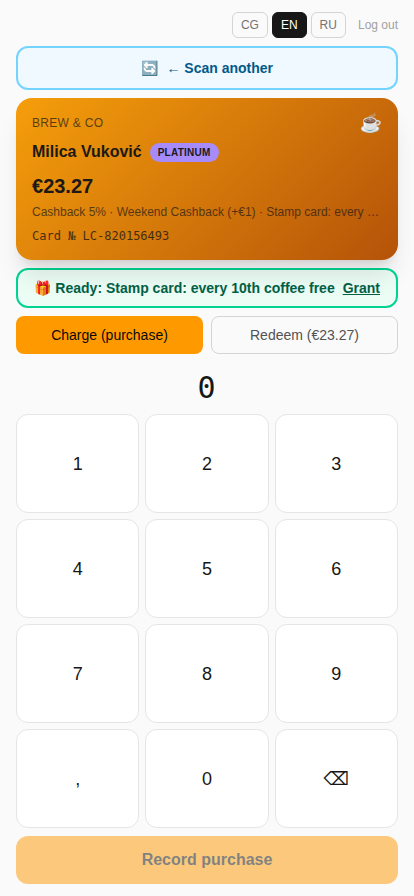
You never pick programs by hand: cashback lands on the balance, a discount is already reflected in the total, and a stamp gets added automatically — all from one bill.
If the amount is large enough to cross the restaurant's manager-approval threshold, your PIN alone won't be enough — the screen will ask a manager to confirm with their own PIN before the purchase goes through. That's expected protection, not an error.
Done with this guest? Tap 🔄 Select client in the top bar, next to the language switcher, to jump straight to the next one — no page reload needed.
04 Scan a receipt
Faster and more accurate than typing the amount in — not available on every plan.
- Find the guest as usual
Then, on the charge screen, tap 🧾 Scan receipt.
- Point the camera at the QR code on the paper till receipt
It's the same QR code that links to the tax authority's site — not the guest's own card QR, the one printed on the actual paper receipt for this purchase.
- Done — the amount and items fill in on their own
The system pulls the verified total and item list from the tax service and applies everything the normal way. Nothing to type.
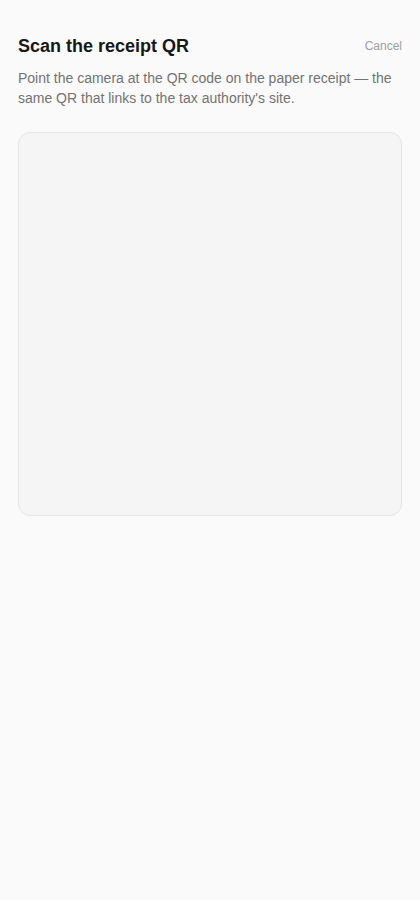
If the receipt won't scan (the tax service is unreachable, the receipt was already scanned once before, or the QR is damaged), the screen offers an Enter manually button right away, dropping you back to the ordinary keypad. Scanning never fully blocks the till.
If the admin has turned on "Disable manual amount entry at the till" in Settings, there's no keypad on this till at all — only the "Scan receipt" button. In that case a purchase can only be charged from an actual scanned receipt.
05 Redeem a bonus
When a guest wants to pay with bonus balance, in full or in part — now a two-step flow.
- Find the guest
Scan or search as above.
- Tap "Redeem (€X.XX)"
The amount in the label is the guest's full current balance.
- Enter the check amount, if asked
This step exists to work out the discount percentage and check any redemption-limit the admin has set. If there's no limit, tap Skip and go straight to the redemption amount.
- Enter how much to redeem
A green box appears right under the keypad: "Payable: €X.XX" and "Discount off the check: Y.Y%" — so the guest immediately sees what's left to pay.
- Tap "Redeem"
Confirms it, the same way as charging a purchase.
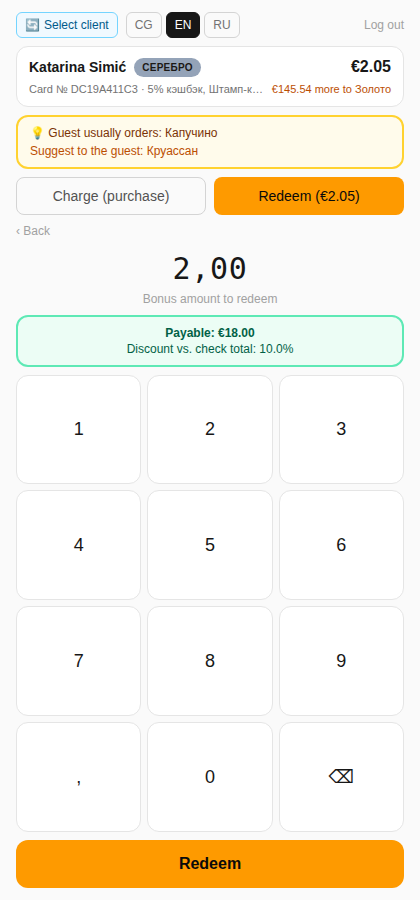
If a guest holds balance across several cashback programs at once, the till still shows one combined total — you never need to pick which program to draw from.
If the redemption amount is more than the check itself, or more than the admin's allowed percentage of it, the "Redeem" button won't be available and the box turns red with an explanation — just lower the amount.
06 Give a stamp-card reward
One tap — no amount to enter.
When a guest's stamp card is full, a green banner appears above the numpad on their charge screen, e.g. 🎁 Ready: Stamp card: every 10th coffee free, with a Grant link. Tap Grant to give the reward — that's the whole flow, no numpad entry needed.
07 Common situations
Guest doesn't have their phone
Look them up manually by name, phone, or card number (see step 02). No card either? Ask the owner/admin to find them by name or phone in the admin panel and read you the card number.
Camera won't start
This is normal on busy or older devices — it's not broken. Just type the guest's name, phone, or card number into the field under the warning; it works exactly the same.
Receipt won't scan
The tax service can be temporarily unavailable, or an old or damaged QR code may not read. Either way, tap Enter manually on the error screen and key the bill total in on the ordinary keypad.
Bonus doesn't cover the whole bill
That's fine — lower the redemption amount to whatever the guest wants to use, confirm, then charge the rest the normal way (cash, card, etc.) outside the app.
Redemption amount is rejected
If it's above the check total, or above the percentage-of-check limit the admin has set, the app will say so and won't let you confirm. Lower the amount until the box turns green again.
Manager approval needed
Shows up on operations larger than the threshold the admin set. Call a manager over — they enter their own PIN right in the dialog that opens, without cancelling what you were doing.
08 If the venue uses Syrve
When Syrve runs the loyalty, this app only lets you find a guest and view their balance. Earning and spending are done at the Syrve till: scan the QR or barcode from the guest's card (or enter their phone) in Syrve itself.